Wednesday, July 14, 2010
Tuesday, May 4, 2010
Saturday, May 1, 2010
Wednesday, April 28, 2010
On eTwinning 5th Anniversary
The pupils of the 5th class C from "Liviu Rebreanu" School, Mioveni Town, Romania are glad to celebrate eTwinning 5th anniversary with their school partners from all the European countries involved in their projects on different topics.
Vezi mai multe video din Evenimente
Vezi mai multe video din Evenimente
Wednesday, April 21, 2010
Activities - 22nd of April
This is your last day in this Learning Lab, so no more time-consuming tasks. This is the time to think back and reflect on your own learning and evaluate this Learning lab.
1. Check that you've accomplished all your tasks.
2. Write in the reflections and evaluation FORUM (optional):
* which activity was the most interesting
* which tools seem most useful for your projects
* any other comments on this Learning event
3. Fill in the evaluation questionnaire. It'll help me and the other tutors of the Learning events to developing these events so that they better suit different teachers' needs.
4. Give your vote and reply to the survey of two questions.
5. Try the web 2.0 tools for fun. Your students will love them: learn and enjoy!
Last Instructions

To get your final certificate you will have to accomplish the assigned tasks and activities. Use the checklist below to check you've finished everything.
Checklist
1. You have written your introduction in the Forum.
2. You have rated and commented the video on the welcome page and given your vote in some of the polls.
3. You have formed a group of 2-3 participants in eTwinning Group Wiki (Wikispaces).
4. You have created your own bookmark page in Delicious or Diigo and linked it to your blog.
5. You have created your own Blog for this Learning event. You have written there a short post about this Learning event and added a picture.
6. You have created a Google calendar and linked it to your blog.
7. You have created a project plan in Google docs collaboratively with your group and published it or a link to it in your Blog.
8. You have added a link to your YouTube video or SlideShare presentation or Flickr/Picasa photos in your Blog. You've embedded one presentation or video in your blog as well.
9. You have created a mindmap (together with your group) about Web 2.0, eTwinning and collaboration.
10. You have filled in the evaluation questionnaire.
Wow, a lot of work!
If you have finished 8 of the above mentioned 10 tasks, you've earned your certifica
Tips for web tutors

The teacher's role is crucial before the actual learning process has started. It's the partner teachers' shared responsibility to schedule the learning process, choose and provide appropriate tools, set the goals and plan the procedure. After that the focus should be on the learners.
* Teacher is a guide on the path students are walking. She/he let's the students walk independently, encourages and supports, helps in crisis, but keeps distance.
* At the beginning the teachers' responsibility is bigger, but towards the end, the students should take responsibility of their own learning and of the process/project.
* When the students face problems, they should first try to solve them themselves and be involved in the problem solving process from the beginning.
* One of the most common mistakes is that the teacher/tutor talks too much and/or imposes her/his own ideas very strongly.
* In learning the process is much more important than the end product.
* Mistakes are an essential part of a learning process and often a very effective way to learn. They're nothing to be afraid of.
* When given the goal and support and appropriate tools, students usually come up with amazingly creative solutions.
* Project learning is always as much learning to learn as learning the actual subject matter.
Here we are, at the finish line
This Learning Event was structured to resemble a short and intense project with all its critical phases.
You've been collaborating, not only while making the project plans and the mindmaps, but all through this Learning Event from introductions (getting connected) to creating groups and commenting each others' blogs, bookmarks and presentations.
I think this community of learners has been fantastic. You've supported and encouraged each other and the more experienced colleagues have helped and given advice to the newbies.
Besides learning about the tools, we've all learned a lot about how to collaborate, how to work together and how to create and manage a learning project.
Those, who have fallen a bit behind, will still have one week to finish their activities. I, for sure, am going to spend a lot of time going through your blogs, bookmarks, project plans and mindmaps to learn and get ideas for new projects and Learning Events.
Web 2.0 tools for fun
Animoto - for making animated photo presentations and shows
Voki - for creating your own speaking avatar
Glogster - for making interactive posters
Sketchfu - for drawing together and sharing
Makebeliefscomix - for making your own comics
Jigsawplanet - for making your own puzzles
Wordle - for making word clouds
Smilebox - for making scrapbooks and eCards
Bitstrips - for creating comics


Tuesday, April 20, 2010
Activities - 21st of April

First check the links and watch the videos and presentations to learn about the presented Web 2.0 tools. I'm not going to ask you to create a Ning learning community or create a Moodle learning environment, but that would be possible as all these tools are freely available on the web. If you wish, you can go and check one of my eTwinning/Comenius courses in moodle. Login with username: tinateacher and password: Tina'sv1s1t. The name of the project is Life across Europe. You can find the link to the students' learning environment in My courses module on the left after you've logged in. Or, you can scroll down the page and find it in Comenius/eTwinning category.
YOUR COLLABORATIVE ACTIVITY:
Write your thoughts and ideas about collaborative learning in a mindmap. Write together with your group:
1. Go to Bubbl.us and start creating a new mindmap. Save your mindmap and create an account at the same time. Invite your group members to create the mindmap together with you by clicking the Friends button on the top right hand corner.
2. Put Web 2.0 – collaboration – eTwinning as your centre concepts. As shown in the picture on the right.
3. Start adding bubbles. This is a brainstorming tool, so associate freely!
4. Use different colours for different group members or use different colours for different types of word families.
5. You could add bubbles on the following topics: goals, challenges, advantages, benefits, support, difficulties, preconditions etc.
6. When the mindmap is ready, click the Menu button at the bottom right hand corner to get embedding code. Embed your mindmap to your blog. (Copy the code, click new entry on your blog, click html/code/<>, paste the code, save.) If your mind map is very big, you can also Print screen, make a picture of your mindmap and attach the picture in your blog.
7. Or even better: upload your mindmap in the document library below (or above, as it seems to jump there against my will and intention).
Collaborative Learning on the Web

To enable collaborative learning on the web these preconditions are entailed:
* the pedagogical goal and content is clear to all participants (teachers and students) - planning
* the participants have learnt to know each other and there's a trust between the partners (teachers and students) - sharing
* there's a safe environment on the web, where direct communication and collaboration can take place
How to collaborate
It's good to remember that in an international project the participants very often communicate using a foreign language. The tasks should not require too demanding level of communication. Here are some examples of how to work together.
Learning conversations: Probably the most important way of collaborative learning and construction of knowledge. The teacher or a student writes a short introduction on a given topic or theme. The students discuss the topic sharing information, asking questions and/or solving problems. Part of this would also be commenting and giving feedback. The learning process is visible to everybody. It entails ability to communicate in foreign language (between partners).
Creating presentations collaboratively: Partners can divide work so that one partner produces a photo story, paintings, a comic strip or a video, and the other produces texts or subtitles or a report or a narration. Students can form small groups with partners from different countries and work together producing articles or presentations.
Making comparisons: Partners coming from different countries and different parts of Europe can work collaboratively by comparing different aspects of their lives. They can create Wikis consisting of pages with tables comparing weather, natural phenomena, school days and holidays, local festivals, food and eating, daily habits, history, arts, architecture etc.
Creating problems, puzzles or quizzes: Students can create quizzes dealing with history, culture, politics, flora and fauna of their own country for each other. Asking good questions or presenting a problem in an interesting way is often a lot more demanding than finding the answers.
Virtual tour: Groups of students from different countries travel together virtually. Each member of the group suggests a place to visit. They divide work: one studies interesting sights, one finds informations about hotels, camping sites etc, one studies local culture and festivals etc. Then the group members share the information they have collected.
Tools for collaborative learning:
* Creating networks and communities with groups and forums: Ning
* Wikis for working together and creating shared documents: Wikispaces
* Working together and sharing documents: Google groups
* Mindmapping: bubbl.Us; Mindomo; Freemind; Mindmeister
* Web meetings: Elluminate; Flashmeeting
* Web magazines: Magazinefactory
* Virtual learning environments (VLE): Moodle, Udutu; eTwinning Twinspace (freely available when you have found a partner and started a project). Virtual learning environments provide you with a set of tools that can be used for collaborative learning. Those usually comprise all the above mentioned tools + some more like polls and questionnaires, exams, learning journals, groups, glossaries, photo galleries etc.
Monday, April 19, 2010
Activities - 19th - 20th of April
Create an account in at least one of these Web 2.0 applications: Slideshare or YouTube. You can see the links above and watch the videos and presentations on the right for instructions. Remember that when you follow the instructions from YouTube video, you can click Pause, do the things instructed and then go on.
1. Make a short powerpoint- or pdf-presentation with 3-4 slides presenting the eTwinning project you planned with your group.
2. Upload the presentation on SlideShare just to test the tool.
OR
3. Make a short 30 sec. video. Present yourself and your eTwinning project idea. Basically, it can just be to say hello.
4. Upload the video to YouTube. You can use your digital camera or webcam to make the video.
5. Embed your video or your slideshow on your blog. (When you have uploaded the video/slideshow, copy the embedding code, click new entry on your blog, click html/code/<>, paste the code, save.)
6. Remember to go and check your group's blogs for the presentations and videos. And leave a comment. That's always fun.
EXTRA
1. If you don't yet have an account in Flickr or Picasa, register in one of them, upload photos and create an album called eTwinning Learning Lab. It can only have a couple of photos.
2. Publish the link to your Picasa or Flickr album on your blog.
Using SlideShare
View more presentations from David Hopkins.
Thursday, April 15, 2010


Activities - 15th - 18th of April
Now you have a bit longer time for these activities. You should work together/collaboratively with your work group. Watch the videos and presentations on the right for instructions. Remember that when you follow the instructions from YouTube video, you can click Pause, do the things instructed and then go on.
1. Create your own Google account in google.com. Click Sign in link in the top right hand corner. Then click Create an account.
2. Create your own Google homepage with your favourite web 2.0 links. Click iGoogle link.
3. Create your own Google calendar for your future project. Add there e.g. school holidays. Publish it. Click More in Google homepage and choose Calendar from the menu. Make your calendar public and get its URL by clicking the HTML logo. Add the clandar link on your blog (or embed it there if you wish). (If you embed it make it 300x400 pix. You can also share your calendar with your work group, but that's not necessary.)
4. Create a project plan in Google docs and publish it. Do this together with you work group partner(s). The first on the list or the quickest invites the others to share the plan. (This is only to test the tool in practice, not to really start a project.)
* Download the eTwinning project planning form from the File archive below and save it on your own computer.
* Click More in Google homepage and choose Docs.
* Then upload the eTwinning project planning form in Google docs by clicking the Upload icon on the top left hand corner.
* Click Share icon and invite your partner(s) to work on it together with you (you'll get their emails from the wiki on page 1). Fill in the form together with your partner. Each memeber uses a different font colour. Add rows if necessary.
* When you're finished publish it on your blog(s) (click Share and Publish as web page).
* If you have problems with publishing it in your blog, you can download it in the file arcive below. Put you group name as the title.
* You can discuss the plan in the Forum if you need to.
5. Relax and enjoy the weekend.
Google Docs
View more presentations from Wayne Highlands School District.
Five Goals of Every Project

Project goals keep the focus on what is most important. However, on some teams these primary goals are lost in their meeting's activities. Make sure each meeting is structured so as to move the project forward. Even if the progress is only inches rather than by huge leaps, the team must be pushing the project forward as quickly, safely, and reasonably as possible.
Finish the project within the scheduled timetable.
Your goal should be to finish the project within the timeframe agreed upon. This means you must do everything possible to drive the project to the end and stay on time. Remember to avoid guessing and incompetence in the planning of the scope so as to have a reasonable time schedule with which to work.
Finish the project within the scheduled budget.
Budgets are set by some project teams while others inherit them. Whether you set the budget or inherit it, you need to make sure you are doing your best to track your expenditures and know where the money is going. When you finish the project within the scheduled budget, you demonstrate your ability in running the project responsibly.
Finish the project with the same level of quality.
Unfortunately, when projects lag behind, quality is often sacrificed in order to catch up. Project leaders sometimes feel that in order to pick up speed, pieces of the project will need to be downsized or cut completely. True, the project plan will have to be revised when problems arise, but the revision should never compromise quality. While it is important to keep deadlines, it is equally important to keep the project's quality high throughout the project.
Finish the project within the specified guidelines.
Make sure you are meeting the customer's needs. You must "wow" the customer! This can be done simply by finishing the project with the specifics the customer really wanted. The best way to solidify this is to verify your accomplishment by customer handoff and close down.
Do the best you can with what you have been given.
There is no such thing as a perfect project. Some projects run up against major odds and hurdles. For example, many recent projects in our country have endured major setbacks because of terror attacks, severe weather causing power outages, or a nation at war. Even against these catastrophes, projects were remarkably turned around and back on track because of great project team leaders and teams. Project goals were met because they did their best with what came their way.
Tools for Planning a Project
It's really important to share some information and discuss and decide a few basic things before you start an eTwinning project. Together with your partner(s) you should agree on
* project goals
* pedagogical contents
* the tools you'll use
* the timetable
Often this is done by sending a lot of emails back and forth. A more effective way is to create a project calendar and a common workspace for making plans together.
Very good tools for this would be Google Calendar and Google Docs. Both you can share with a partner and also publish in the net. They're very easy (and free) to create and use.
Google Docs is a great collaborative tool also for learning.

Wednesday, April 14, 2010
Documentation
Using a blog in a project
In a learning project it's good to pay attention to which parts of the process can be shared with everybody and which parts should be carried out in safe and private environment.
On one hand, pupils' collaboration: forums chats and wikis must take place in a secure protected environment. On the other hand, it's important to share the process and its outputs with te whole school, parents and the surrounding community.
Blogs are excellent for being used as project diaries. You can write there weekly what's happening in the project, publish pictures, make links to photo galleries and embed video clips, podcasts and presentations. You may also allow commenting, but blogs aren't good tools for discussions.
Activities - 14th of April
Watch the Presentation and the Video about blogs. Rate them. This is a great advantage of Web 2.0. You can find loads of good tutorials and instructions freely available. You don't have to do it all yourself.
1. Create your own NEW blog (a public project diary on the web) for this Learning Event. Choose colours and template. Write a short entry dealing with this Learning event and your future eTwinning project.
* add a photo in your blog
* add important links (a link to your Delicious or Diigo bookmarks) in your blog
* you can create your own blog here: Blogger or Wordpress
2. Write in the FORUM and share the web address of your new eTwinning blog with your partners here in this learning event. You can also comment this task.
3. Add you blog URL in your (profile) account. You can do it by clicking the link on the right called website.
4. Check your work group members' new blogs and write positive comments. Show that you're interested in their work. If you don't have a work group yet, you still have time to get one.
I have created the blog with this link: http://anatudorexploitingweb20.blogspot.com/
In a learning project it's good to pay attention to which parts of the process can be shared with everybody and which parts should be carried out in safe and private environment.
On one hand, pupils' collaboration: forums chats and wikis must take place in a secure protected environment. On the other hand, it's important to share the process and its outputs with te whole school, parents and the surrounding community.
Blogs are excellent for being used as project diaries. You can write there weekly what's happening in the project, publish pictures, make links to photo galleries and embed video clips, podcasts and presentations. You may also allow commenting, but blogs aren't good tools for discussions.
Blog Tutorial
View more presentations from alancarr.
Activities - 14th of April
Watch the Presentation and the Video about blogs. Rate them. This is a great advantage of Web 2.0. You can find loads of good tutorials and instructions freely available. You don't have to do it all yourself.
1. Create your own NEW blog (a public project diary on the web) for this Learning Event. Choose colours and template. Write a short entry dealing with this Learning event and your future eTwinning project.
* add a photo in your blog
* add important links (a link to your Delicious or Diigo bookmarks) in your blog
* you can create your own blog here: Blogger or Wordpress
2. Write in the FORUM and share the web address of your new eTwinning blog with your partners here in this learning event. You can also comment this task.
3. Add you blog URL in your (profile) account. You can do it by clicking the link on the right called website.
4. Check your work group members' new blogs and write positive comments. Show that you're interested in their work. If you don't have a work group yet, you still have time to get one.
I have created the blog with this link: http://anatudorexploitingweb20.blogspot.com/
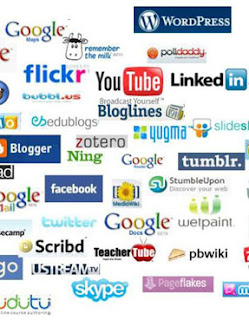
What is Web 2.0?
Web 2.0 changed the average internet surfer from passive consumer to active participant. The level of participating can vary from simple rating or voting through blogs and galleries to creative learning communities.
Web 2.0 is about sharing your ideas and opinios. It's about open source applications and free tools for everybody. It's about giving and getting.
Web 2.0 supports the idea of an active and creative learner. As tools for collaboration make the learning process visible, the focus changes from the product to the process. And thus, the teachers role changes from a distributor of knowledge to a guide on the path of learning and understanding.
Activities - 13th of April
In this first topic, we start from the first level of participating: rating, voting and commenting and, finally, sharing your favourites. You have one day to accomplish the following activities:
1. Watch the presentation Top 100 Tools for Learning - rate the presentation.
2. Take part in the poll: vote for your favourite tool from this very limited selection.
3. Watch the video Social Media in Plain English - rate the video and add a comment if you wish.
4. Create an account in Delicious.com or in Diigo.com (if you have one, try the other too). Save your favourite bookmarks. Then you can access them easily from any computer. Share your bookmarks with us by writing the www-address in the FORUM (use the add link tool and choose target blank).
5. Check through your fellow teachers' bookmarks. When you find a new, interesting link, reply and comment.
5. Form teams of 2-3 persons. Use the eTwinning work groups Wiki below. Click eTwinning Groups and then Edit. Form your group under the appropriate subcategory and write your name, home country and email. You are welcome to rename the groups according to your own preferences, if you like. These groups are created for the collaborative activities in this learning lab. You can discuss the goups in the introductions FORUM.
A Difficult Choice
I use a lot of tools and it wasn’t easy for me to choose only one in order to vote. However, I do it. I have 22 Websites using Blogger: a personal one, “English teacher” (http://AnaTudor.blogspot.com), a Website for a course I have just attended in Bulgaria “How to teach interactively”, E-learning_Bulgaria_2010 (http://e-learningbulgaria2010.blogspot.com/) and 20 Websites for e-Twinning projects. Besides, I used Magazine factory, which helped me to create an on-line magazine of my school, bilingual - Romanian and English, (http://magazinefactory.edu.fi/magazines/liviurebreanuschool/) and another one for an e-Twinning project – “Structure of Educational systems - Counseling in Balkans” (http://magazinefactory.edu.fi/magazines/educationalsystem/index.php). I am the chief editor of both of them and an editor and a journalist for 2 other magazines factory. I like to make e-Twinning projects and I use a lot of tools: Word, PowerPoint, slide com, slide share, You tube, Trilulilu, etc.
Web 2.0 is about sharing your ideas and opinios. It's about open source applications and free tools for everybody. It's about giving and getting.
Web 2.0 supports the idea of an active and creative learner. As tools for collaboration make the learning process visible, the focus changes from the product to the process. And thus, the teachers role changes from a distributor of knowledge to a guide on the path of learning and understanding.
Top 100 Tools for Learning 2009
View more presentations from Jane Hart.
Activities - 13th of April
In this first topic, we start from the first level of participating: rating, voting and commenting and, finally, sharing your favourites. You have one day to accomplish the following activities:
1. Watch the presentation Top 100 Tools for Learning - rate the presentation.
2. Take part in the poll: vote for your favourite tool from this very limited selection.
3. Watch the video Social Media in Plain English - rate the video and add a comment if you wish.
4. Create an account in Delicious.com or in Diigo.com (if you have one, try the other too). Save your favourite bookmarks. Then you can access them easily from any computer. Share your bookmarks with us by writing the www-address in the FORUM (use the add link tool and choose target blank).
5. Check through your fellow teachers' bookmarks. When you find a new, interesting link, reply and comment.
5. Form teams of 2-3 persons. Use the eTwinning work groups Wiki below. Click eTwinning Groups and then Edit. Form your group under the appropriate subcategory and write your name, home country and email. You are welcome to rename the groups according to your own preferences, if you like. These groups are created for the collaborative activities in this learning lab. You can discuss the goups in the introductions FORUM.
A Difficult Choice
I use a lot of tools and it wasn’t easy for me to choose only one in order to vote. However, I do it. I have 22 Websites using Blogger: a personal one, “English teacher” (http://AnaTudor.blogspot.com), a Website for a course I have just attended in Bulgaria “How to teach interactively”, E-learning_Bulgaria_2010 (http://e-learningbulgaria2010.blogspot.com/) and 20 Websites for e-Twinning projects. Besides, I used Magazine factory, which helped me to create an on-line magazine of my school, bilingual - Romanian and English, (http://magazinefactory.edu.fi/magazines/liviurebreanuschool/) and another one for an e-Twinning project – “Structure of Educational systems - Counseling in Balkans” (http://magazinefactory.edu.fi/magazines/educationalsystem/index.php). I am the chief editor of both of them and an editor and a journalist for 2 other magazines factory. I like to make e-Twinning projects and I use a lot of tools: Word, PowerPoint, slide com, slide share, You tube, Trilulilu, etc.
Tuesday, April 13, 2010
Activities - 12th of April
During each different phase of this Learning Event there are activities and tasks you're supposed to carry out within the given timeline. The "welcome activities" are:
1. Get acquainted with the general goals and contents of this learning event
2. Fill in the (profile) information in your own account and add a photo of yourself
3. Watch the video Shift happens - rate it and write a comment. Which of its statements struck you as most interesting/challenging/frightening?
4. Go to the FORUM (on the right on the navibar) and write an introduction of yourself in the appropriate subcategory in Introductions (post a new thread). Write the subject you teach or the (project) theme or topic you're interested in as the title of your post. Don't start any other discussions yet. They're for your upcoming tasks.
5. Read the forum posts of your fellow teachers and reply to at least two. Ask about their pupils, school, home town, hobbies etc. Get connected! Start making workgroups of 2-3 persons
A Challenging Movie
Looking at this challenging movie I had the opportunity to understand how important is for us and our pupils to know more about our environment. The new technologies make quick steps and they are for a better life. But we must don’t forget that we have to prepare the future of our kids and we are responsible for this. By means of e-Twinning and Comenius projects, we have the chance to offer to our pupils a new world, a communication channel, a great expectance in a future of peace.
Exploiting Web 2.0; eTwinning and Collaboration
"What exactly is collaboration? How does it contribute to a fuller pedagogical experience for teachers and pupils? What tools promote collaboration in project work? When is it appropriate to use collaborative learning techniques? These questions and more will be explored in this interactive learning event which is suitable for teachers of all disciplines and school levels."
- Tiina Sarisalmi -

Timetable and programme:
0. April 12th - Welcome - Introductions
1. April 13th - What is Web 2.0
2. April 14th - Documenting the learning process - project diary
3. April 15th- 18th - Planning and managing a project
4. April 19th- 20th - Sharing videos, presentations, photos, documents
5. April 21st - Collaborative learning on the web
6. April 22nd - Conclusion, reflexion and evaluation
- Tiina Sarisalmi -


Timetable and programme:
0. April 12th - Welcome - Introductions
1. April 13th - What is Web 2.0
2. April 14th - Documenting the learning process - project diary
3. April 15th- 18th - Planning and managing a project
4. April 19th- 20th - Sharing videos, presentations, photos, documents
5. April 21st - Collaborative learning on the web
6. April 22nd - Conclusion, reflexion and evaluation
Subscribe to:
Posts (Atom)
